
Make this Easy Low-Sugar French Jam With Fresh Berries and Only 3 Ingredients!
- gailannbrown701
- Aug 6, 2025
- 3 min read
As summer reaches its height, local markets overflow with vibrant, juicy, fresh fruits. This Easy Low Sugar French-Style Jam is a delightful way to take advantage of this summer's abundance, with less sugar, allowing the natural flavor of the berries to shine through. Say goodbye to overly sweet supermarket jams and discover a more natural and delicious spread with chunks of real fruit.
This homemade jam is a must-try for anyone who wants the rich flavors of summer without the guilt of high sugar levels. Let’s explore how you can create your own batch (or two) of this delightful jam at home!
Why Low Sugar Jam?
Health-conscious individuals have been on the lookout for alternatives to high-sugar products, and for good reason. A typical commercial jam can contain as much as 50 grams of sugar per 100 grams. In contrast, this Easy Low Sugar French-Style Jam uses just 25 grams of sugar per 100 grams, making it a much healthier choice. This means you can indulge in your favorite fruit spreads without derailing your health goals.
With this recipe, you can experience the joy of homemade jam—gorgeous spreads and an explosion of fruit flavor, all while keeping sugar to a minimum.
What You’ll Need
To embark on this sweet journey, gather the following ingredients:
1.5 to 2 pounds of fruit: Choose from strawberries, blueberries, peaches, cherries, or other seasonal favorites.
1¼ to 1½ cups white sugar: Adjust based on your taste preferences.
Juice of one lemon: Adds brightness and helps with preservation.
Half a package of low-sugar Sure-Jell: Optional, but great for consistency.
A pinch of salt: Enhances the flavor.
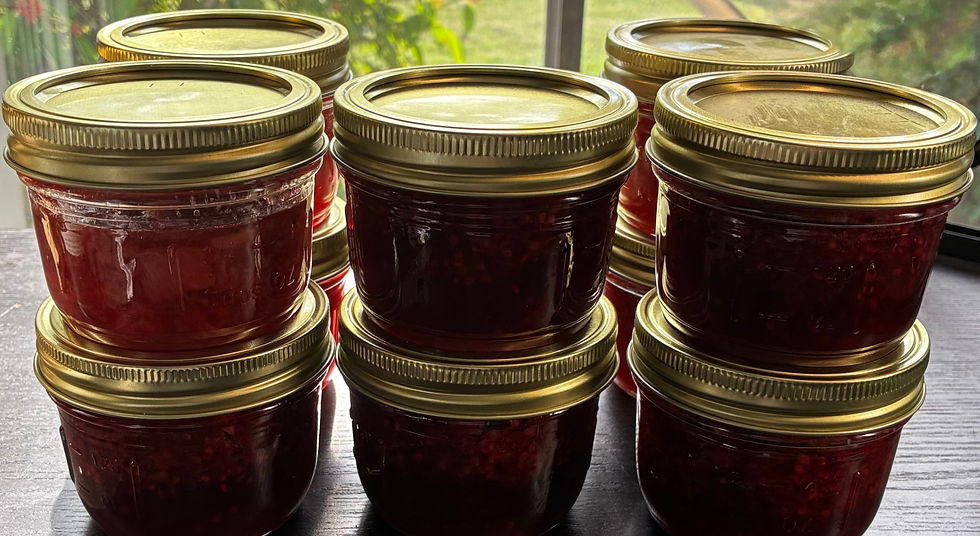
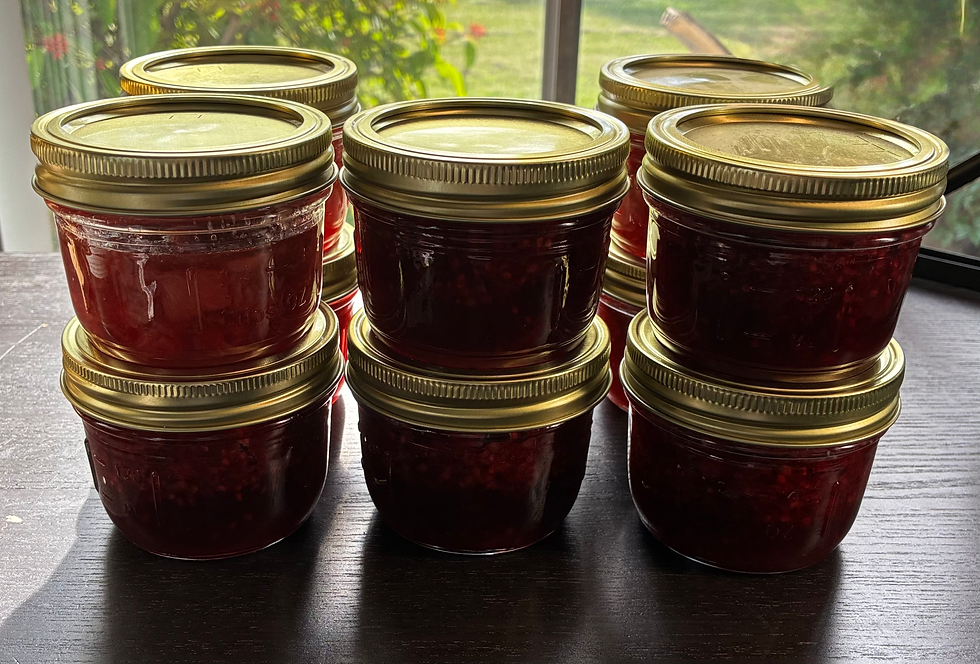
This recipe yields about six jars of jam (8 oz. each) and costs roughly $1 per jar when fruits are in season, making it both economical and delicious.
Step-by-Step Instructions
Step 1: Prepare Your Fruit
Wash your chosen fruit thoroughly. For soft fruits like strawberries and peaches, cut them into larger pieces to help with cooking. Smaller, firmer berries, such as blackberries and raspberries, can be left whole, preserving their shape and texture.


Step 2: Macerate the Fruit
In a large bowl, toss the diced fruit with lemon juice and sugar. Cover with plastic wrap and refrigerate the mixture overnight. This maceration process draws out the juices, creating the perfect base for flavorful jam.


Step 3: Check Sweetness
The next day, taste the fruit mixture. Depending on the natural sweetness of your fruit, you might want to adjust the sugar slightly. This is your chance to personalize the jam!
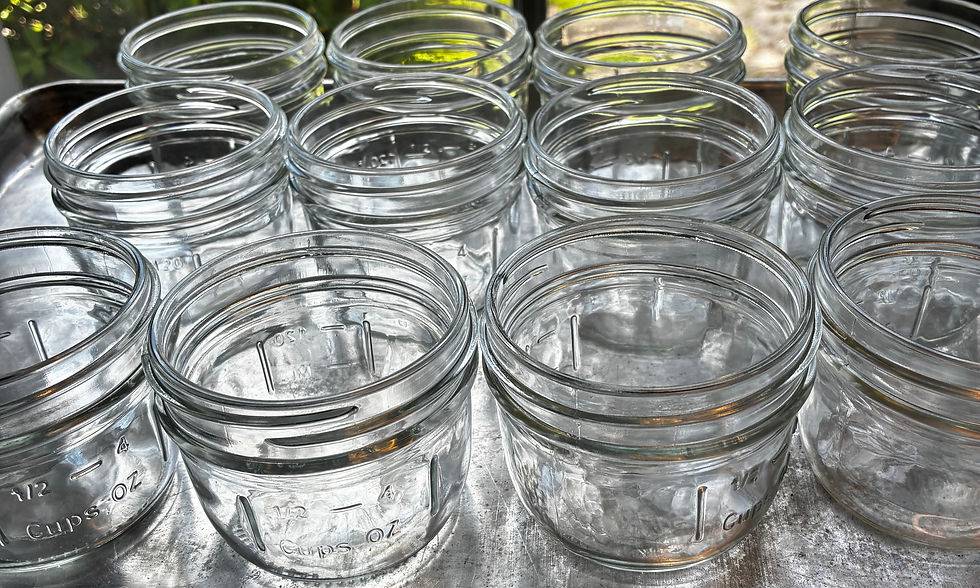
Step 4: Sterilize Jars and Lids
There are many ways to sterilize jars, but I use one of two methods. First, put the jars in a dishwasher and clean on a high heat setting. Secondly, wash the jars, rinse them, and place them on a cooking sheet in a 175-degree oven for at least 30 minutes. Turn the oven off and allow the jars to cool. Careful--they will be hot.
To sterilize lids, place them in a bowl and pour boiling water over them. Allow to cool slightly before attempting to handle.
Step 5: Cook Your Jam
Pour the macerated fruit into a kettle and stir in the Sure-Jell if you chose to use it. Heat the mixture over medium-high heat, bringing it to a boil. Allow it to boil for about 5 minutes, skimming off any foam or scum that forms on the surface.
Note: If you choose not to use Sure-Jell, use a strainer to get the juice off of the fruit, and boil it until it is quite thick, 15 minutes or so.


Step 5: Jar It Up
Remove your cooked berries from the heat and cool slightly. Be careful--it will be very hot. Carefully ladle the hot jam into sterilized jars. Seal the lids tightly so the jam stays fresh.


Step 6: Water Bath Processing
To preserve your jam, process the jars in a boiling water bath for 10 minutes. This step is crucial for creating a vacuum seal that helps the jam last longer.


Step 7: Cool and Store
After processing, let the jars cool completely. Check that each jar has sealed well. If any jars haven't sealed, simply store them in the refrigerator and consume within two weeks.
Store your sealed jars in a cool, dry place. Enjoy your tasty, low-sugar treat for up to 12 months!
The Joy of Homemade Jam
Making your own jam allows for endless customization. Mix and match fruits, experiment with flavors, or add spices like cinnamon or vanilla for an exciting twist. The opportunities to create unique combinations are abundant!
Additionally, homemade jams make thoughtful gifts. Sharing your creations with friends and family is a lovely way to spread joy. There's something heartfelt about gifting a jar of low-sugar jam made with love.


Comments